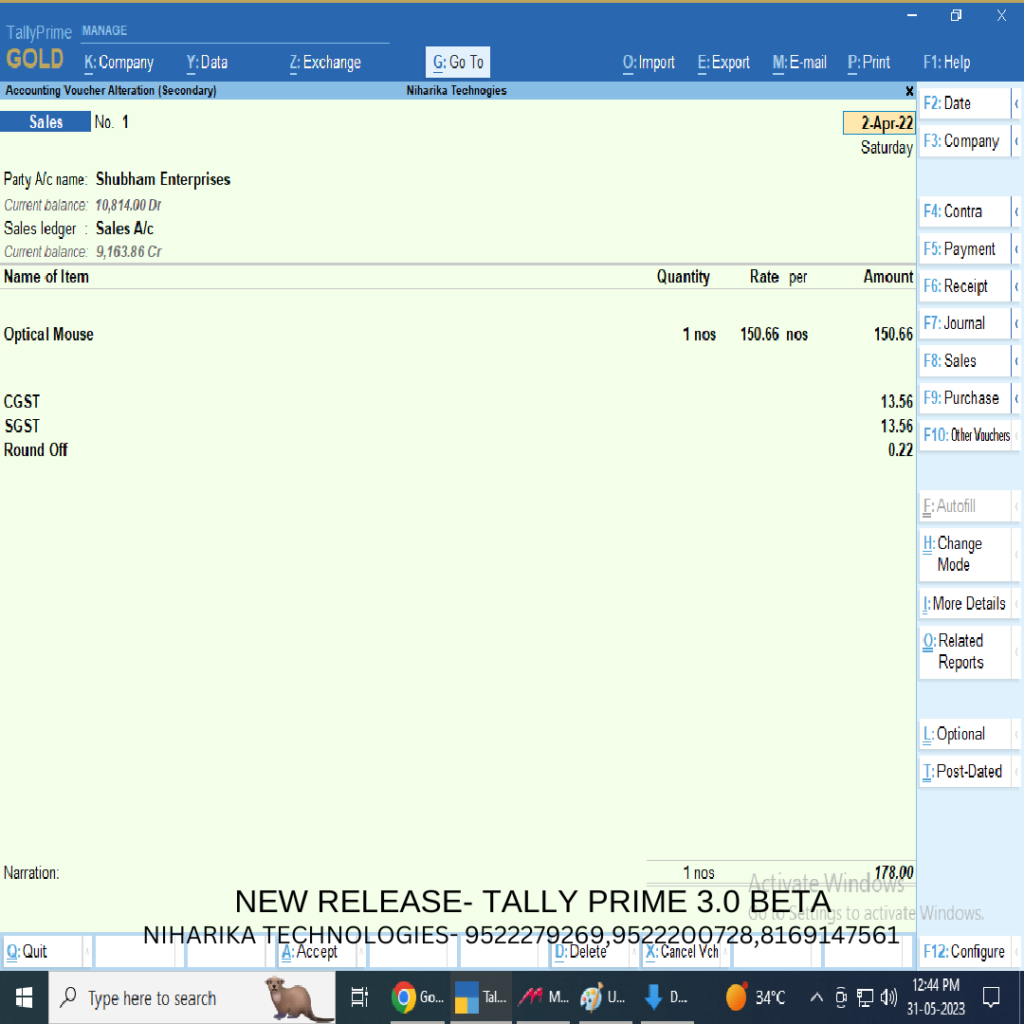
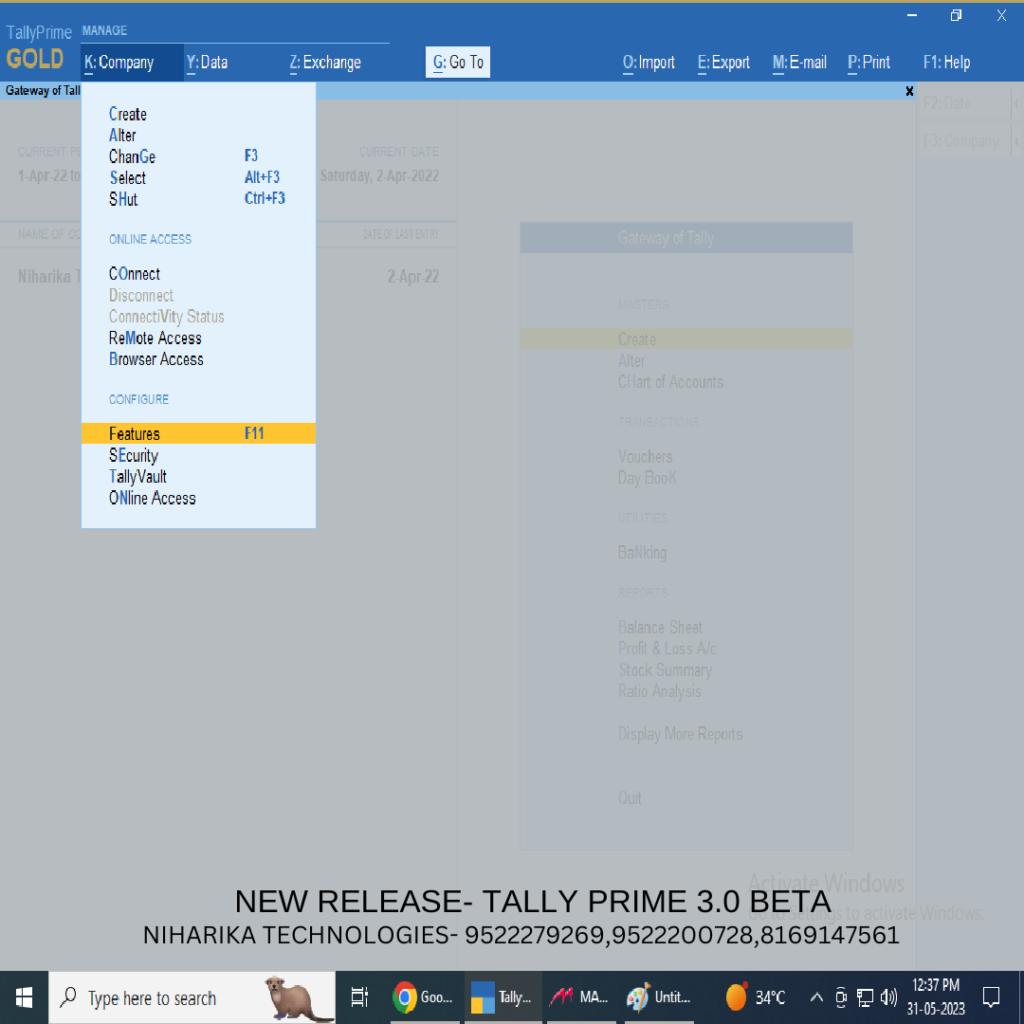
Open TallyPrime and enable the Payment Request feature:
- Pres F11 > Show more features > Yes.
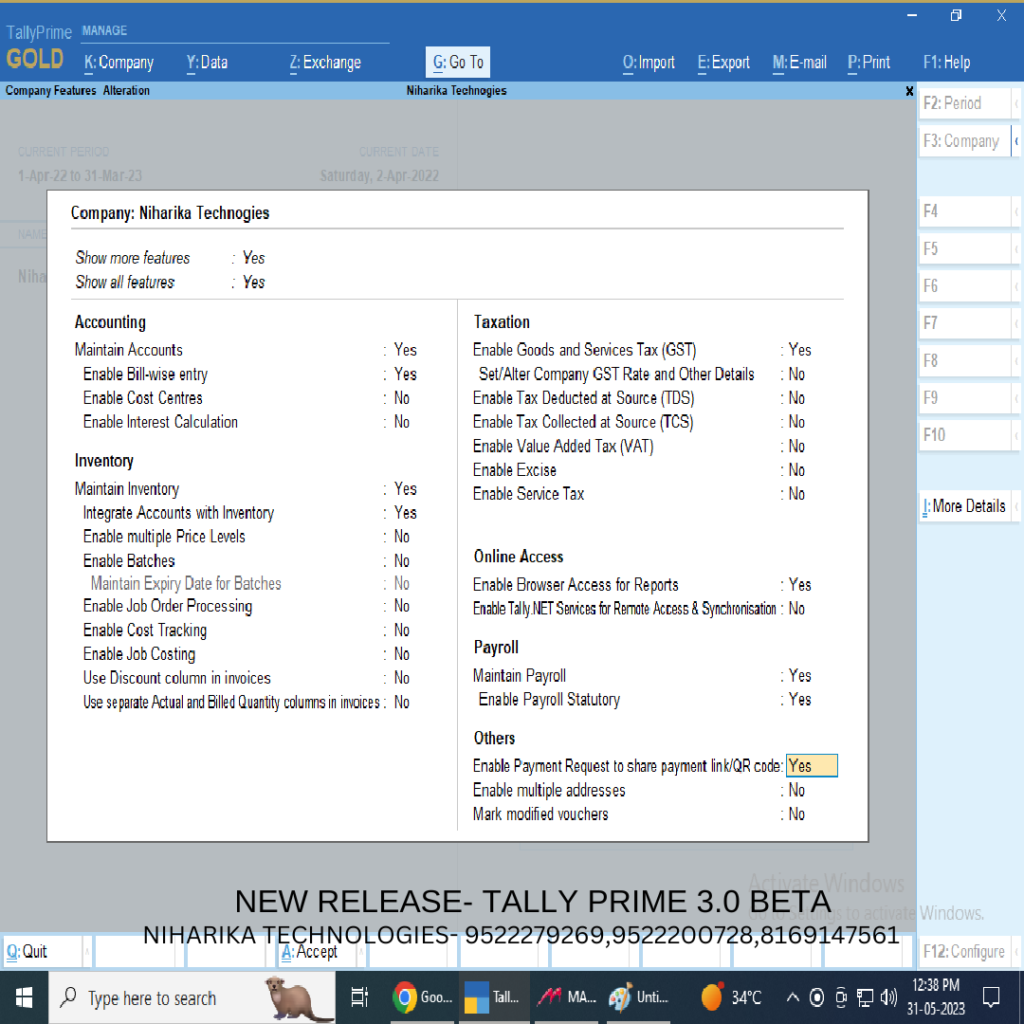
- Set the Enable Payment Request to share payment link/QR code option to Yes.
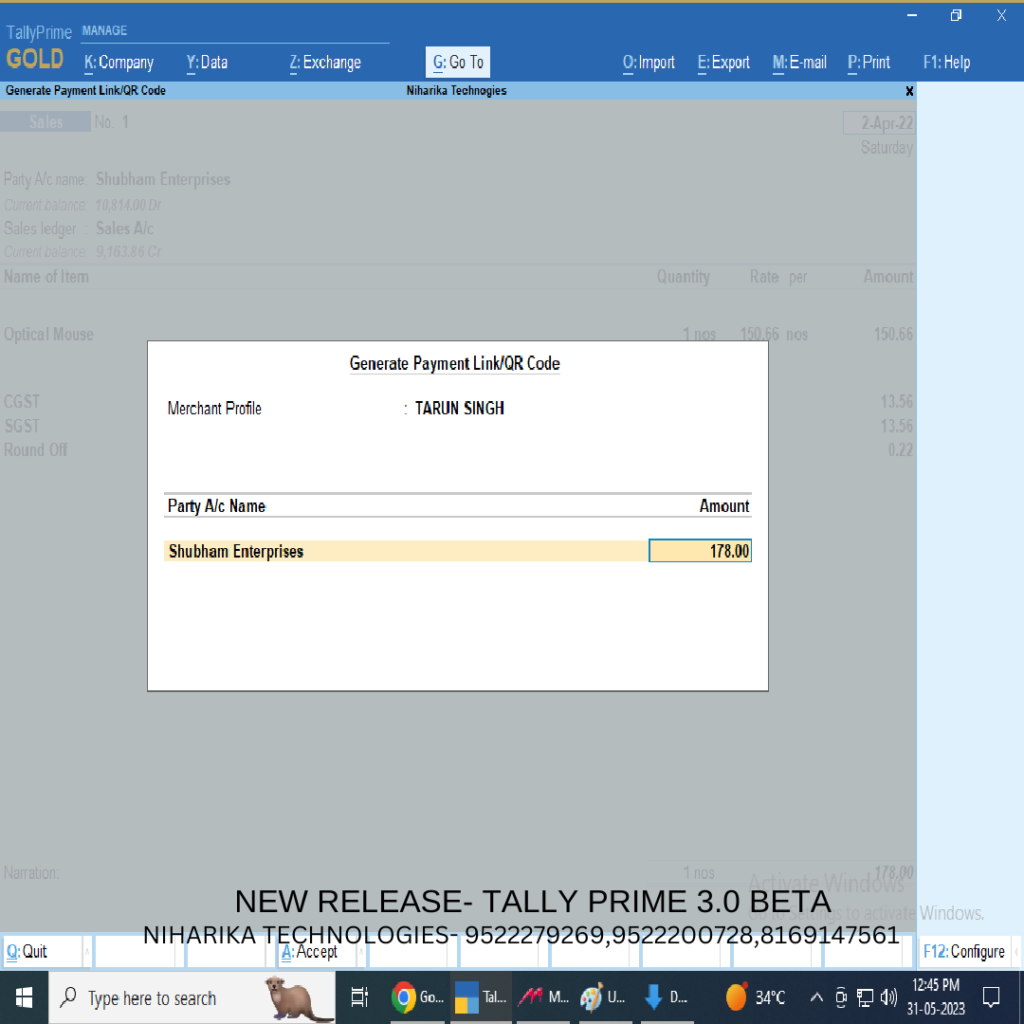
The Merchant Profile Details screen will appear, where you can set up your Merchant Profile.
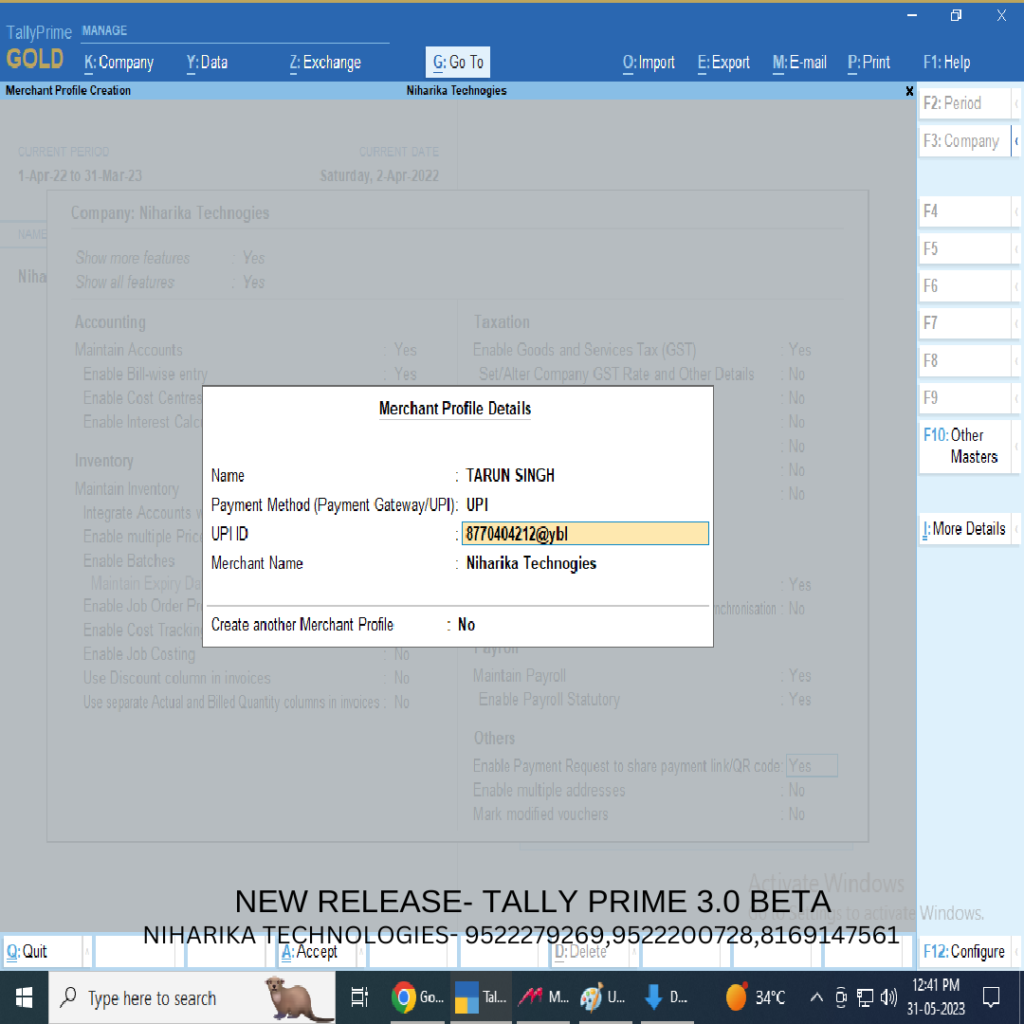
Set up the Merchant Profile:
- Under Name, enter the username with which you want to maintain this profile.
- Under Payment Method (Payment Gateway/UPI), specify the Payment Gatewaywith which you have registered this particular profile.
- Enter the Merchant ID, as registered on the Payment Gateway portal.
- Enter the Registered E-mail and/or Registered Mobile.
One or both of these fields will appear as per the Payment Gateway selected. - Under Payment link expires in, set the expiry period after which your payment link will be considered as invalid.
The default period will be pre-filled as per the Payment Gateway selected; for example, 180 days for Razorpay and 365 days for PayU. You can update this, if needed.